
Note: Access to this feature is only available if the Brittco Software license includes the 'Training' module.
You may add your own documents Each of these documents may be viewed at any time, and can be scheduled for staff as a "required document to be read". If scheduled, a button is available to confirm that the document was read. A report is available that includes the history of all documents that have been read.
IMPORTANT NOTE: The documents must be in a PDF format and has a file size limitation of 10MB.
Add Documents
1. From the Training module, click 'My Documents'. OR, you can access the "Documents" tab on the Client Information screen.
2. Click 'Select File'.
3. Browse your computer and select the file to be added to Brittco and click 'Open' (it must be a PDF and less than 10MB).
4. Click 'Add Document'.

5. Select the newly-added document.
6. Populate the fields as desired (all are optional) and click 'Save Changes'.

Access and View
1. From the Training module, click 'My Documents'. OR, you can access the "Documents" tab on the Client Information screen.
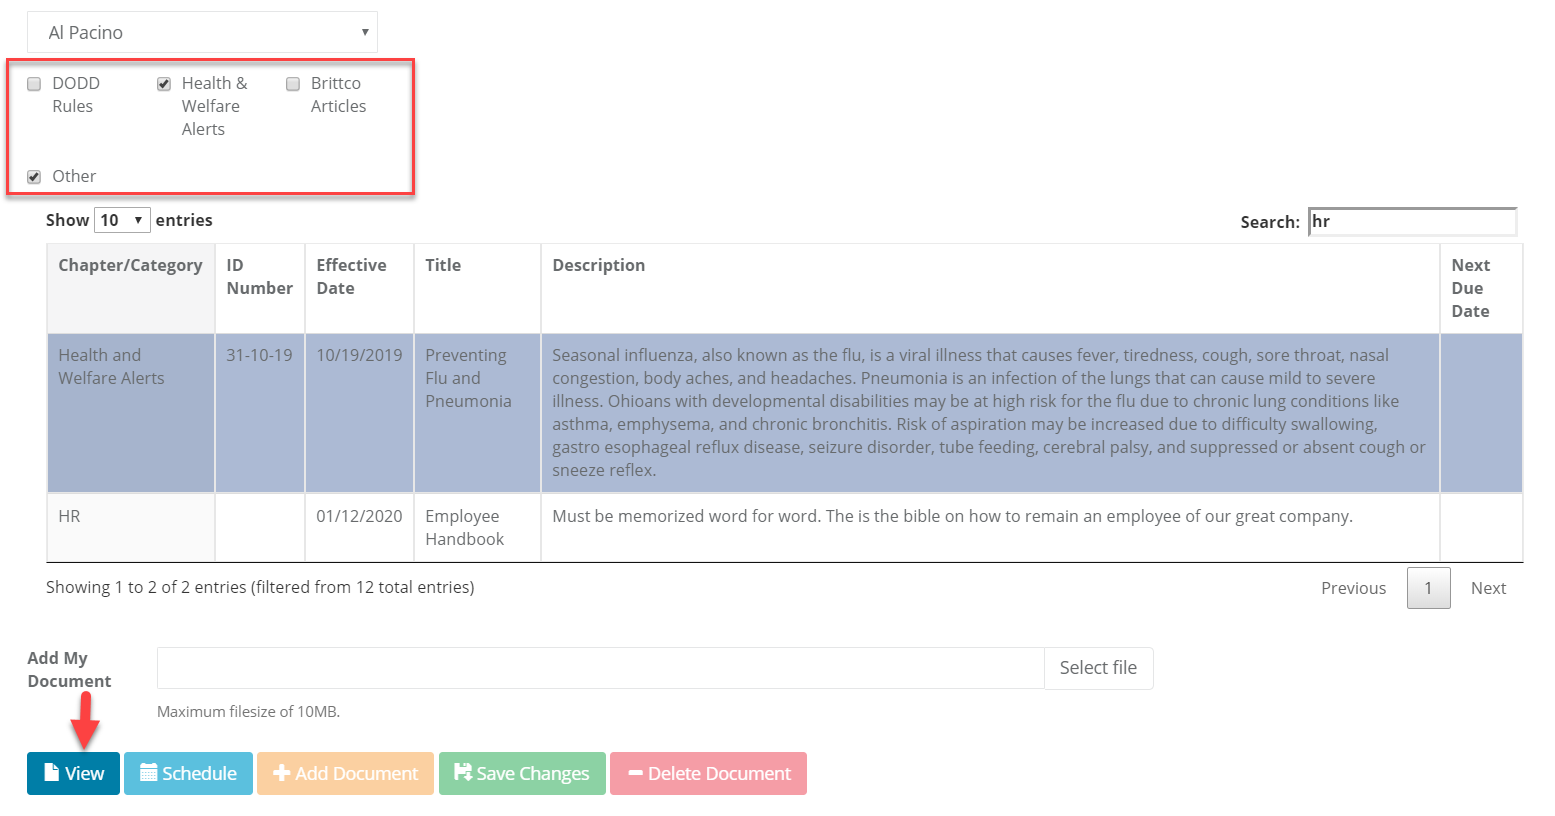
2. Choose the the desired filters to include all the documents that you wish to access.
Note: when clicking the check-boxes on and off, the document list will automatically refresh. The "Link Documents to Staff' and "Link Documents to Client" are only related to the 'Other' documents filter. After selecting a staff or client in either of these drop-downs, you will need to click the refresh button.
Note: this is not pertinent if accessing the documents from the Client Information screen.
3. Select the document you want to view and click the 'View' button.
Note: The remainder of this article only applies when accessing 'My Documents' on the Training screen.
Link a Document to a Staff or Client
1. Select the document you want to link or associate with a specific staff or client.
2. Select the staff or client you want to link to the document.
3. Enter in the Effective date, Title, and Description.
4. Click 'Save Changes'.

Schedule a Reading Assignment
1. Select the document you want as the reading assignment.
2. Click the 'Schedule' button. A window will appear that looks like:
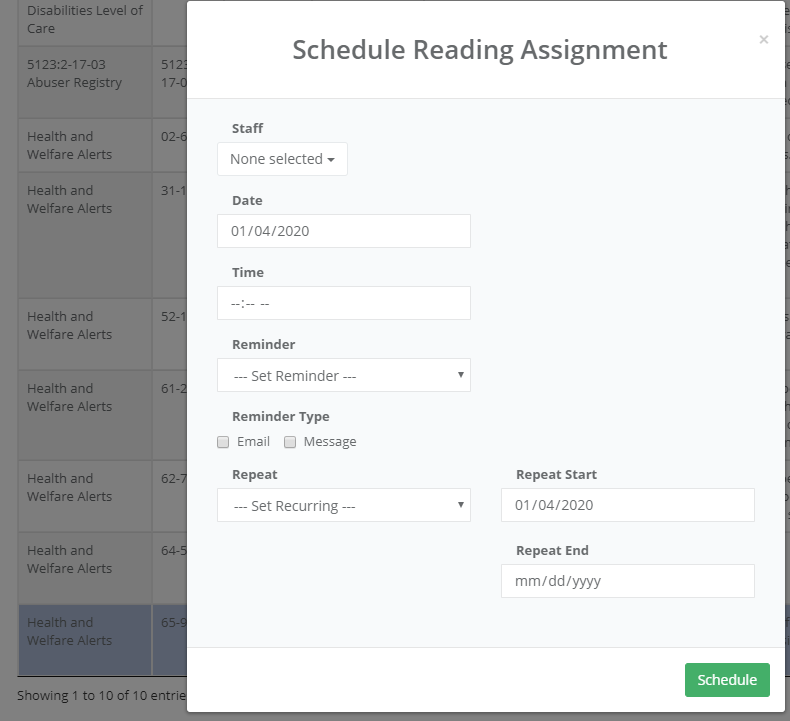
3. Populate these fields as you would when scheduling an event in the Scheduler, selecting one or more staff names that you want assigned to read the selected document.
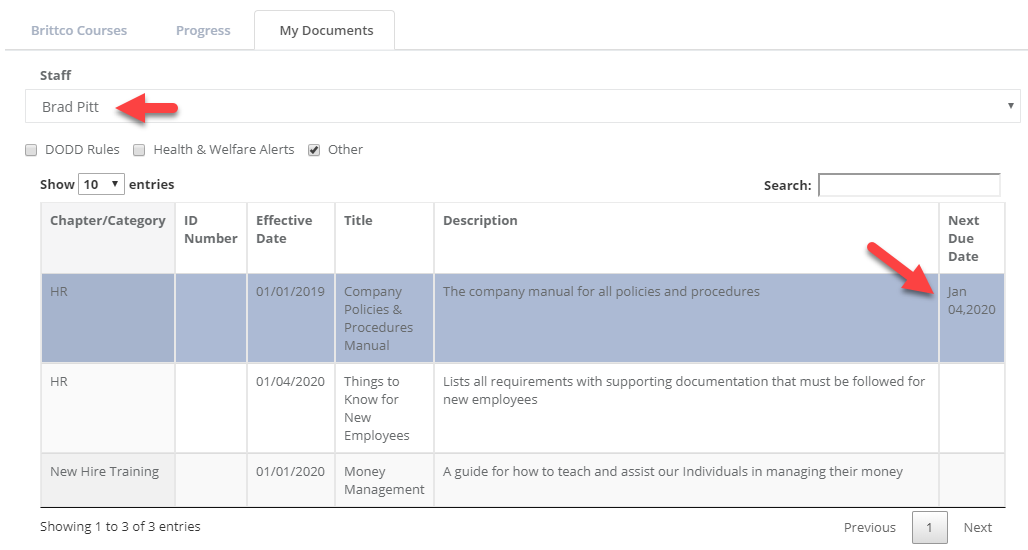
5. By selecting a staff name from the dropdown menu, the scheduled due dates for reading assignments can be viewed.
4. Once the reading assignment has been scheduled, it can be found on the Scheduler as any other event. Clicking on the Event Title will display the document. Clicking the 'Agree' button is confirming that the document has been read. The standard Scheduler reports are available for a history of documents that have been read.
Note: The "Agree" button will never go away for those that are not scheduled for that document.
When an administrator clicks on a reading assignment on the Scheduler, the document will not be opened. Instead, the Scheduler Event will be opened so that it can be edited.
IMPORTANT! Do not change the Event Title to any reading assignment.