
Case Notes
Go to Case notes, then in drop down click Create personal view – at bottom of drop down.
Look for: Case Notes Use Saved View (New)
Select Individual Supported change equals to contains data
Select Start Time change equals to on or after then input date
Select Note change equals to contains data
Then you need to go to edit columns tab – new screen pops up – add column - scroll down to note and put check mark beside it, as well as Service and Location. Click ok –click ok
Click results –Big red ! at top left and it should generate what you asked for.
Click Export Case notes – on top right side
Demographics
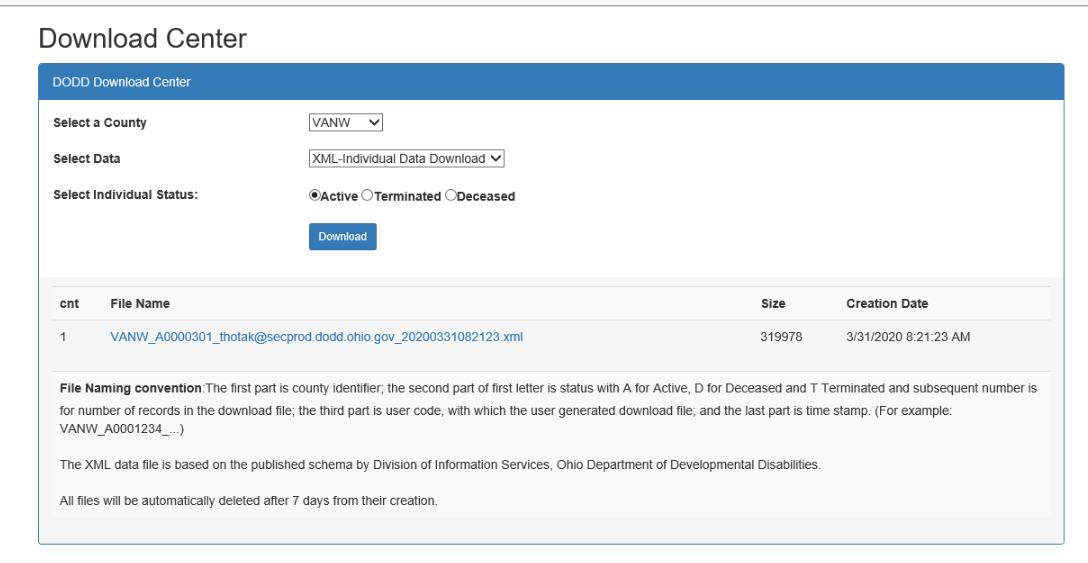
1. Go to Download Center.
2. Download "XML-Individual Data Download" for Active, Terminated and Deceased - you will need to do it once for each.
Once you've have all of your files created, upload them here: https://send.brittcosoftware.com/u/tyler