
In this article, we will be building a custom form.
When we start the building process, the Forms screen will show a list of the current forms with the ability to create more. Click the black "Create New Form" option on the right side of the screen to start building a new form.

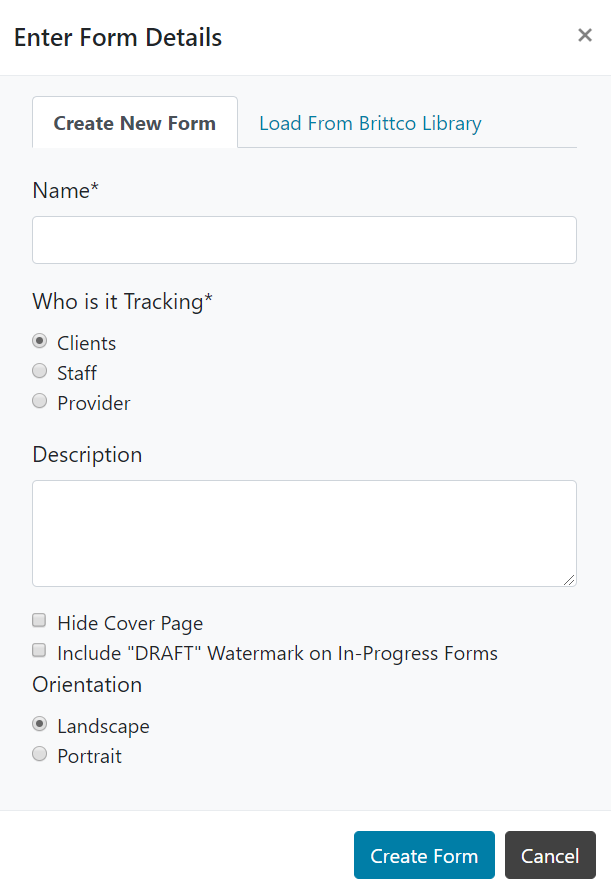
When we click the "Create New Form" option, the screen above will appear. Click the 'Create Form' option to starting the form building process.
Once you have named the form, click the 'Create Structure' option shown below to start adding fields to the form.

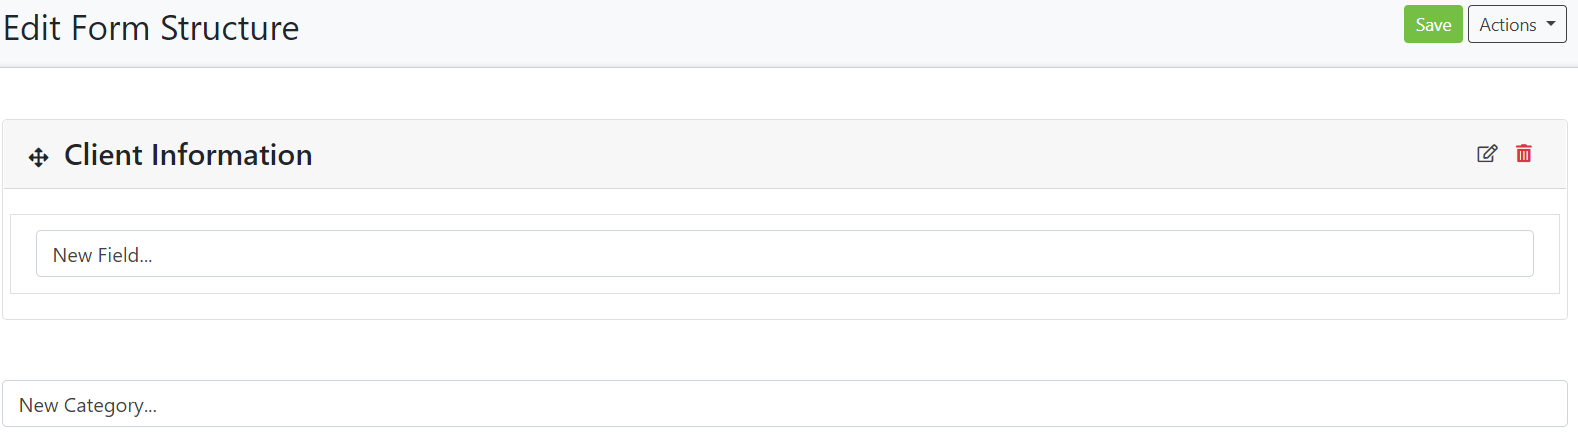
Here is where we build the form. We need to create a new category and the fields that go into the categories. For example, if we type in the new category field 'Client Information' and press Enter on the keyboard, then it will populate and the fields box will appear to continue building on the section. The images below will show what happens after the category is entered.

Here we can fill out the field option with what parts we want in that category.
Terminology: Categories- the sections of the form
Fields- the sections inside the categories.
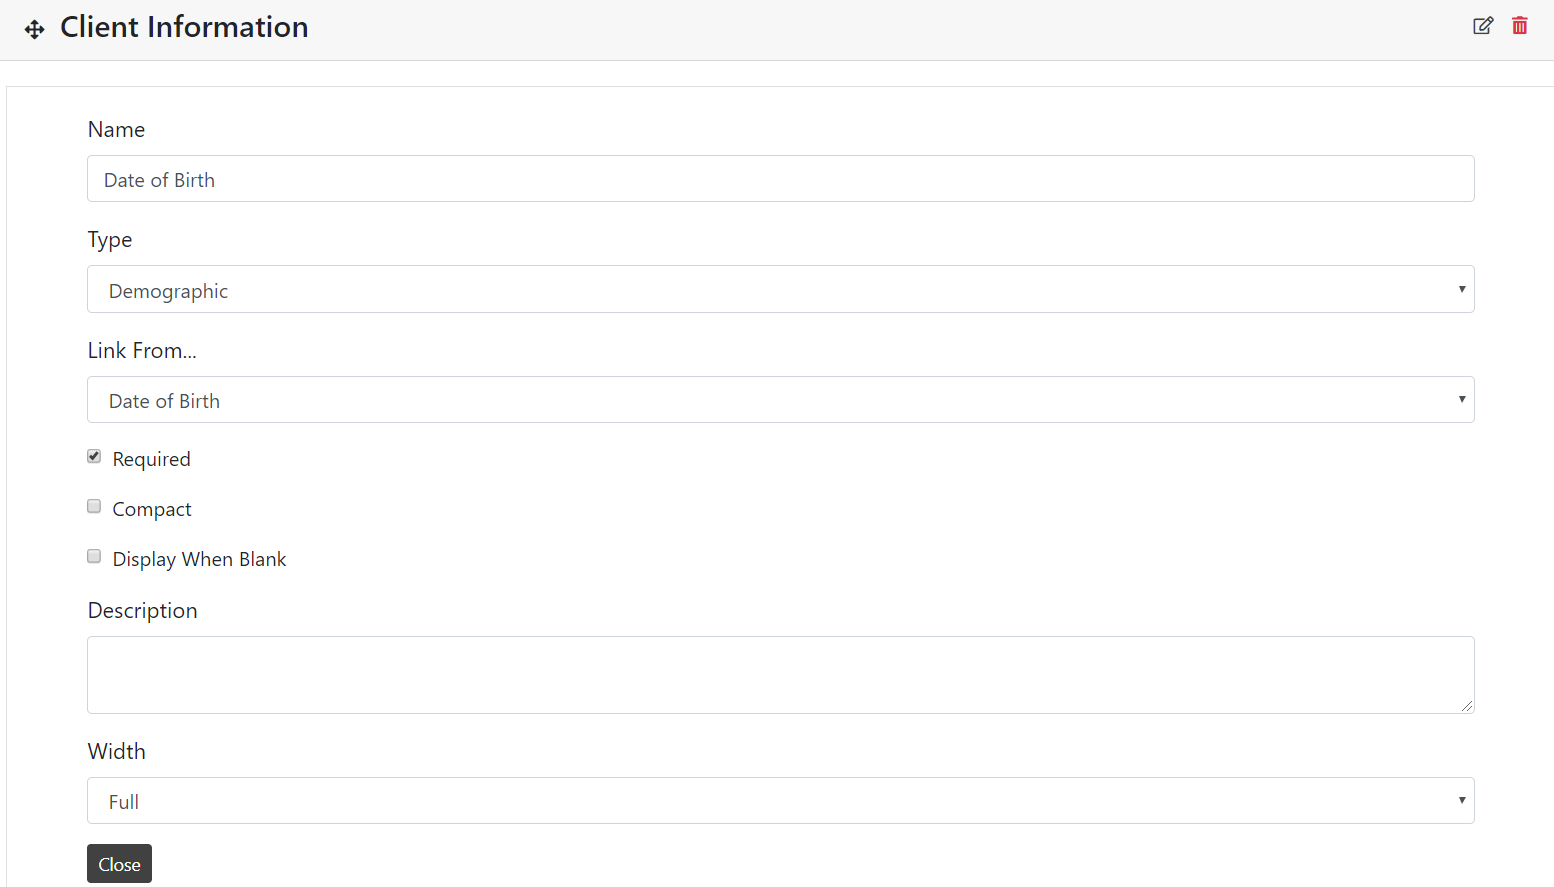
You can enter as many categories and field as you would like. There is a 'Required' checkbox. If the created field is essential, then it is recommended to make it a required field. The description field will explain the field.
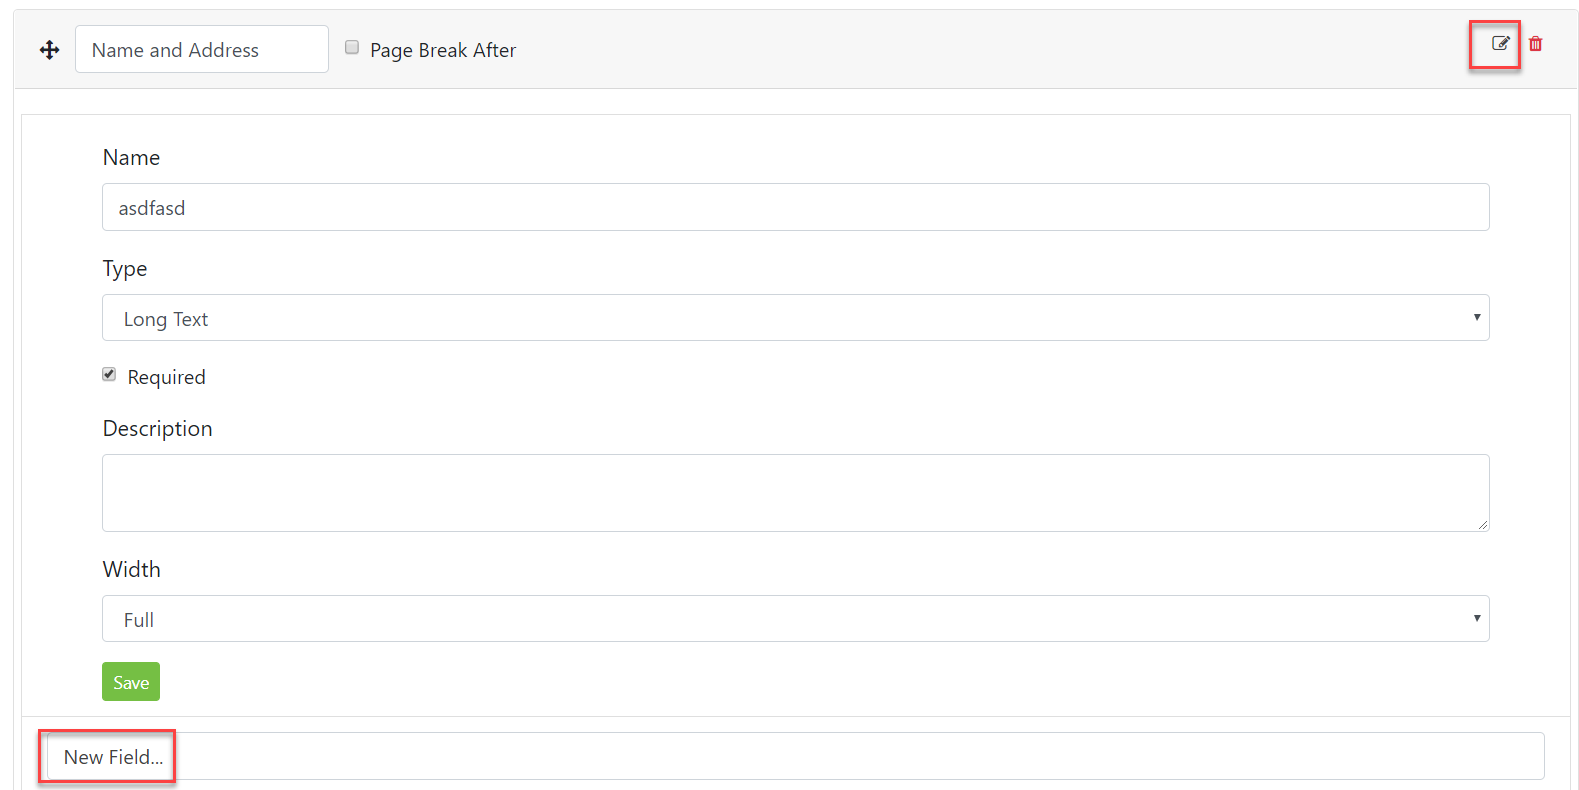
To create a field in the created category, click inside the 'New Field', type the name of the field, and click enter. This will create the field and will need to be edited. This will also allow for more fields to be created.
The 'Type' is how you want to format the field. Different types of fields are useful for different situations.
The way to edit the title or name of the category is to click edit option in the header on the right side next to the red delete button. This will allow you to edit the name and create a page break for the form if needed. To complete the change, press the Enter button on the keyboard.
We have the ability to move categories and fields up and down the form, plan, or assessment. The four-arrow symbol in the images shown below will move the categories or fields. This helps give you the flexibility to rearrange the plan to flow better.

Click the green 'Save' button to save anything that has been created. The green save options in the fields does not save the information so we need to save by clicking the 'Save' option next to the 'Actions' option shown below.